Announcement

Collapse
No announcement yet.

Horizontal Tank Divider

Collapse
X
Collapse
  •  

  • Horizontal Tank Divider

    OK, so the entire thing took about 20 minutes to build! Of course, as I suspected, hubby wouldn't let me play with sharp objects. While he was cutting, I removed the filter, gathered some marbles for the sides & then realized I forgot to take pictures of the material before we started. Oops. I didn't remember till he had already cut the mesh, egg crate & had started with the zip ties.

    Hubby measured & cut the egg crate as close to the inner dimension of the tank as possible. Then he cut the plastic mesh to the same measurements, cutting a hole in both for the heater. He did not cut a hole for the filter right now because I have a new one on the way that sits on the bottom. Until it gets here, I won't be using my new divider.

    I got suction cups with hooks on them from Walmart. Egg crate from Home Depot & the plastic mesh from Hobby Lobby. I ended up having to go to all 3 places, lol.

    We decided to use tiny zip ties to hang the 4 suction cups on instead of fishing line due to it not being necessary for it to be suspended because of the tight fit hubby made. They're really not even needed but we put them on anyway.

    I lined the short sides with marbles to prevent any of my smaller guppies or Endlers from getting through to the bottom & to help prevent any of the larger fry from getting through and possibly being eaten by one of the mama guppies, platies or mollies.

    The little fry can still get through to the top, but there's nothing I can do about it. At least there's hundreds of tiny escape routes for them! Not to say that there won't be a few snacks along the way, but overall it's functional & that's all I needed.


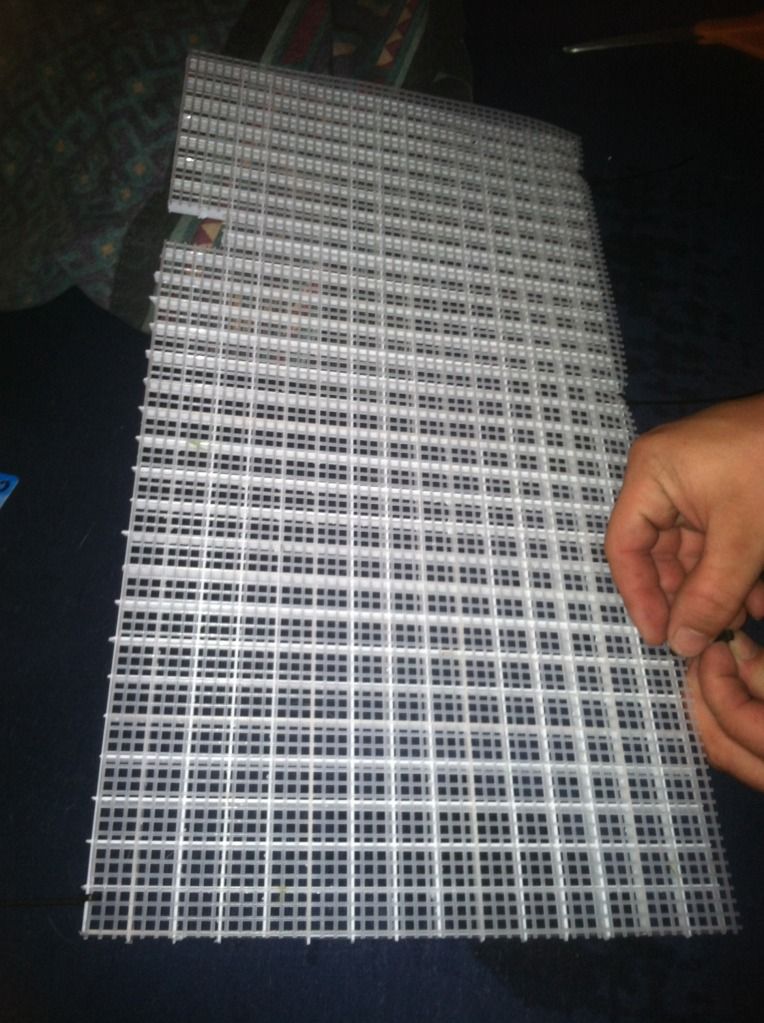
    Hubby tying the plastic mesh to the egg crate


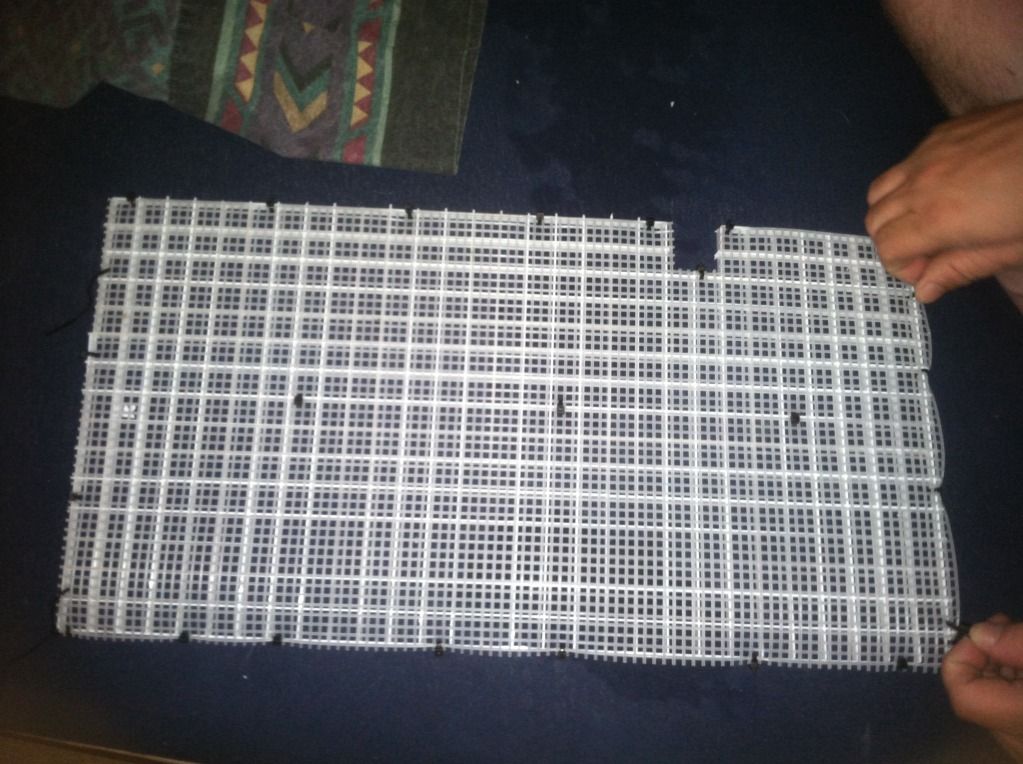
    Hubby tying the tiny loops on for the suction cups

    He clipped off all of the little burrs on the sides, as well.


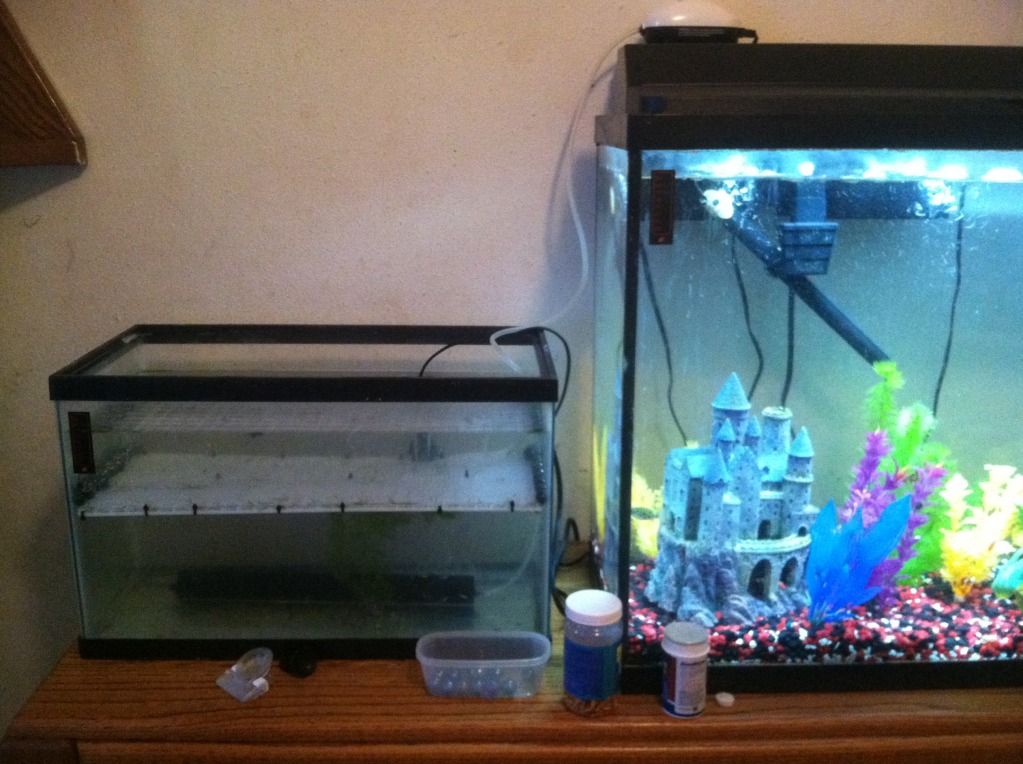
    View from the front. Yes, I know it's a little crooked but I wasn't trying to be geometrically perfect for the picture.
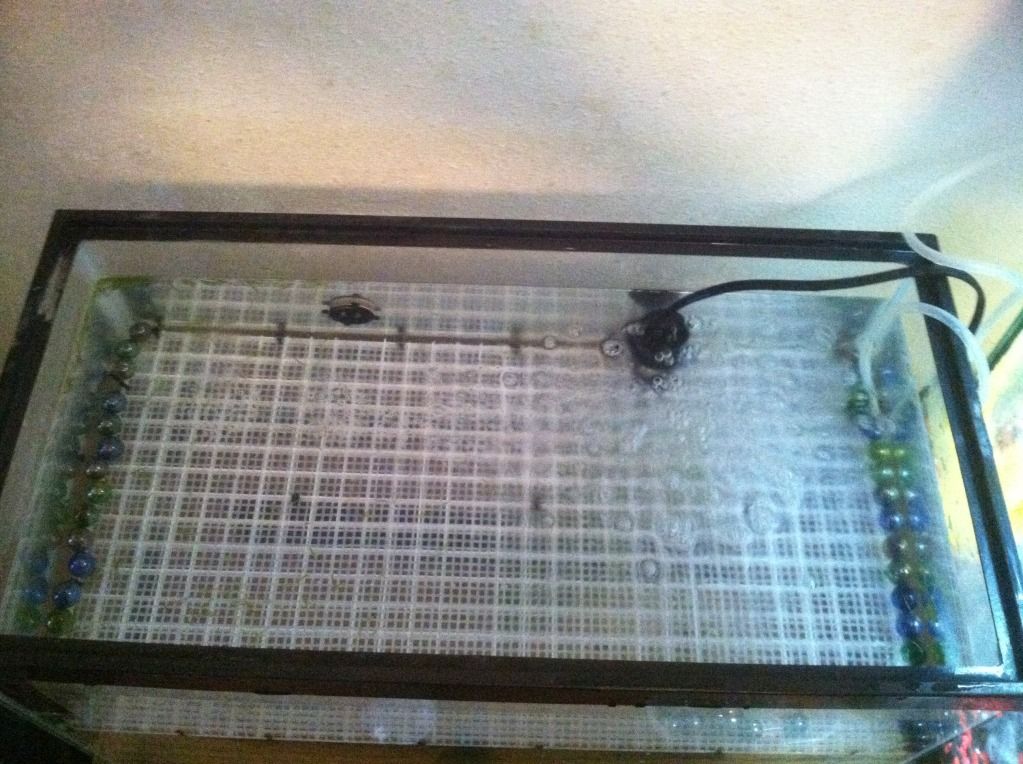

    View from the top

    • ScorpiosWife
      #15
      ScorpiosWife commented
      Editing a comment
      Fancy, I thought of carpeting the bottom doing that... even made a thread about it & then decided on this instead & bought a plant, lol. I'm too lazy to weave moss!

    • Fancyfish
      #16
      Fancyfish commented
      Editing a comment
      LoL

    • TexSun
      #17
      TexSun commented
      Editing a comment
      Great, Ive been looking to do something like this. Thanks for the DIY.
    Posting comments is disabled.

Latest Articles

Collapse

  • Building a Canopy for a 125 Gallon Tank
    by Hangman
    Well, its 2 AM and I just got pretty much done with the canopy.

    Supplies:

    1 4x8 plywood (red oak)
    16 ft. large molding trim
    16 ft small molding trim
    17 ft smal angle modling trim (to make the cabinet doors)
    2 sets of hinges.

    1st: Cut the ply wood into strips to make the front and side of the cabinet:


    P9020006 by HangTheMan, on Flickr

    2nd: Make sure the edges of the strips are 45 degrees to make ...
    09-03-2012, 01:49 PM
  • Horizontal Tank Divider
    by ScorpiosWife
    OK, so the entire thing took about 20 minutes to build! Of course, as I suspected, hubby wouldn't let me play with sharp objects. While he was cutting, I removed the filter, gathered some marbles for the sides & then realized I forgot to take pictures of the material before we started. Oops. I didn't remember till he had already cut the mesh, egg crate & had started with the zip ties. Hubby measured & cut the egg crate as close to the inner dimension of the tank as possible. Then he cut the ...
    08-22-2012, 07:50 PM
  • DIY LED Build
    by cichlid1409
    So, I've been wanting to upgrade to a LED fixture on my coral tank for a while now. As I looked online at all the fixtures I found they were either too much moolah or not bright enough IMO. So I decided to pull the trigger and try to build my own. After digging around online and figuring out a game plan this is what I decided to go with: 12 - 3w cree XP-G (white) 12 - 3w cree XP-E (royal blue) 1 - meanwell 35-700 driver 1 - meanwell 60-1050 driver 60 degree lenses 10in X 10in heatsink Custom ...
    03-24-2011, 12:22 PM
  • Continual Air Removal From Siphon Tubes On Overflow Box
    by jarrodaden
    I was looking for a way to automate the air removal from the siphon tubes on my overflow box without running risk of pumping the siphon tubes empty. I was also worried about siphoning them dry during a power outage via the air tube.

    Using an aqua-lifter pump, I came up with a solution.

    Attached is a DIY video link.

    ...
    09-26-2010, 03:11 PM
  • Wet/dry Filter Outlet Anti-Siphon Hole - Shield preventing messy spitting at startup
    by jarrodaden


    I had a problem with water squirting out the anti-siphon hole on my wet/dry outlet and Dustin at Houston Aquarium Warehouse gave me this idea.

    Simple and easy to do.


    ...
    09-26-2010, 01:21 PM
  • DIY Background- Vinyl
    by Zebvance
    I had a black background on my 240 from Petsmart. I had a lot of problems with it. Water would get in between the background and the tank when I would service the tank. It got on my nerves enough for me to rip it off. I ended up having the idea of laying down one big piece of vinyl (a big black sticker) on the back instead of painting it. I am not a very good painter and I didn't want to do something that permanent to my tank. So I picked up a 96x30 sheet of vinyl from the local decal shop...
    08-28-2010, 01:25 PM
Working...
X